

How To Cut And Paste Photos On Macbook Pro
 The Mac now has the highly desirable "Cut and Paste" file feature throughout the Mac OS X desktop and Finder, allowing users to truly cut and paste to move the selected documents or folders to a new location, rather than just making a copy of them. In this sense, the cut & paste ability behaves much like the Windows explorer counterpart, and it represents a fast and efficient way to move and relocate files from one location to another location, without using the standard drag & drop approach that has been standard on the Mac since the origins of the OS.
Using the cut and paste file feature can be seem a little tricky at first, but it's really not complicated. All you need to do is learn to differentiate the keystrokes that make the action happen. Let's cover exactly how to cut and paste to move files and folders around on the Mac.
How to Cut & Paste Files and Folders in Mac OS X with Keyboard Shortcuts
What you need to do first is select files in the Mac file system browser, known as Finder, and then combine a series of keyboard shortcuts. The keystrokes necessary for cutting and pasting files on the Mac are as so:
- FIRST: Command+C copies the files or documents in the Finder, note they won't be 'cut' yet
- SECOND: Command+Option+V pastes the documents into the new desired location on the Mac, cutting it from the prior locating and moving it to the new location
Remember, you must have a file selected for the cut & paste to work on Mac.

Important: If you just hit Command+V you will only move a copy of the files into the new location, as in a true copy and paste, rather than a cut and paste function. Notice holding down the Option key also changes the menu text to show "Move Items Here" to further signify the difference if you use the menu based approach described below.
Cutting & Pasting Files on Mac with Menu Options
You can also cut & paste files and folders entirely from the Edit menu in the Mac Finder.
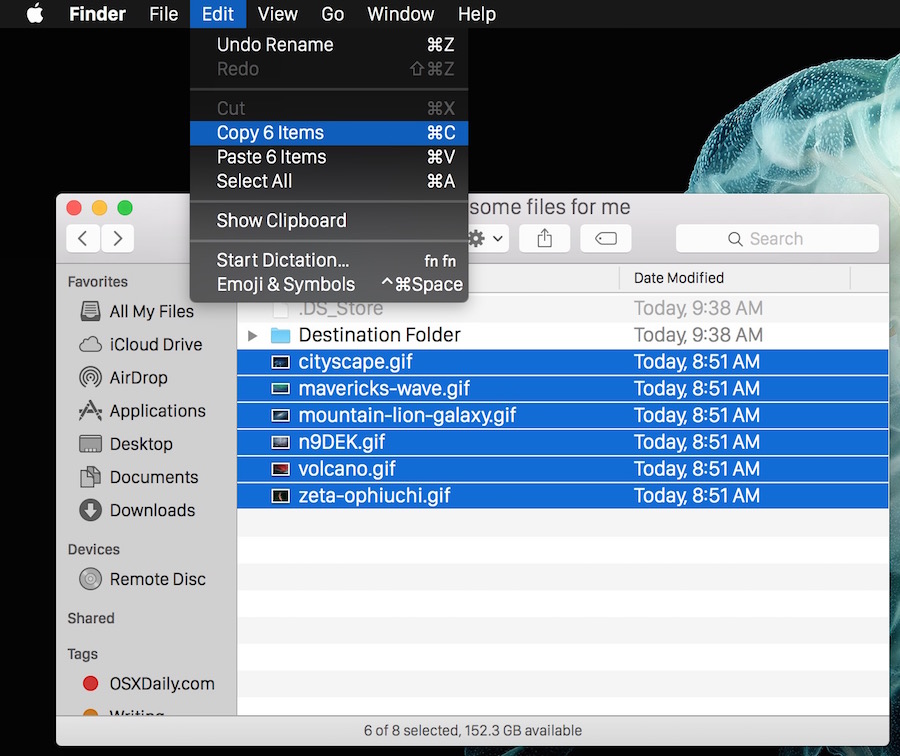
- Select the files / folders you wish to move in the Finder, then pull down the "Edit" menu and choose "Copy"
- Now navigate to the new location in the Finder where you want to 'paste' the files to
- Go back to the 'Edit' menu in Finder and hold down the OPTION key to reveal "Move Items Here" (the Paste command changes to this, choose that to complete the file cut and paste in Mac OS X
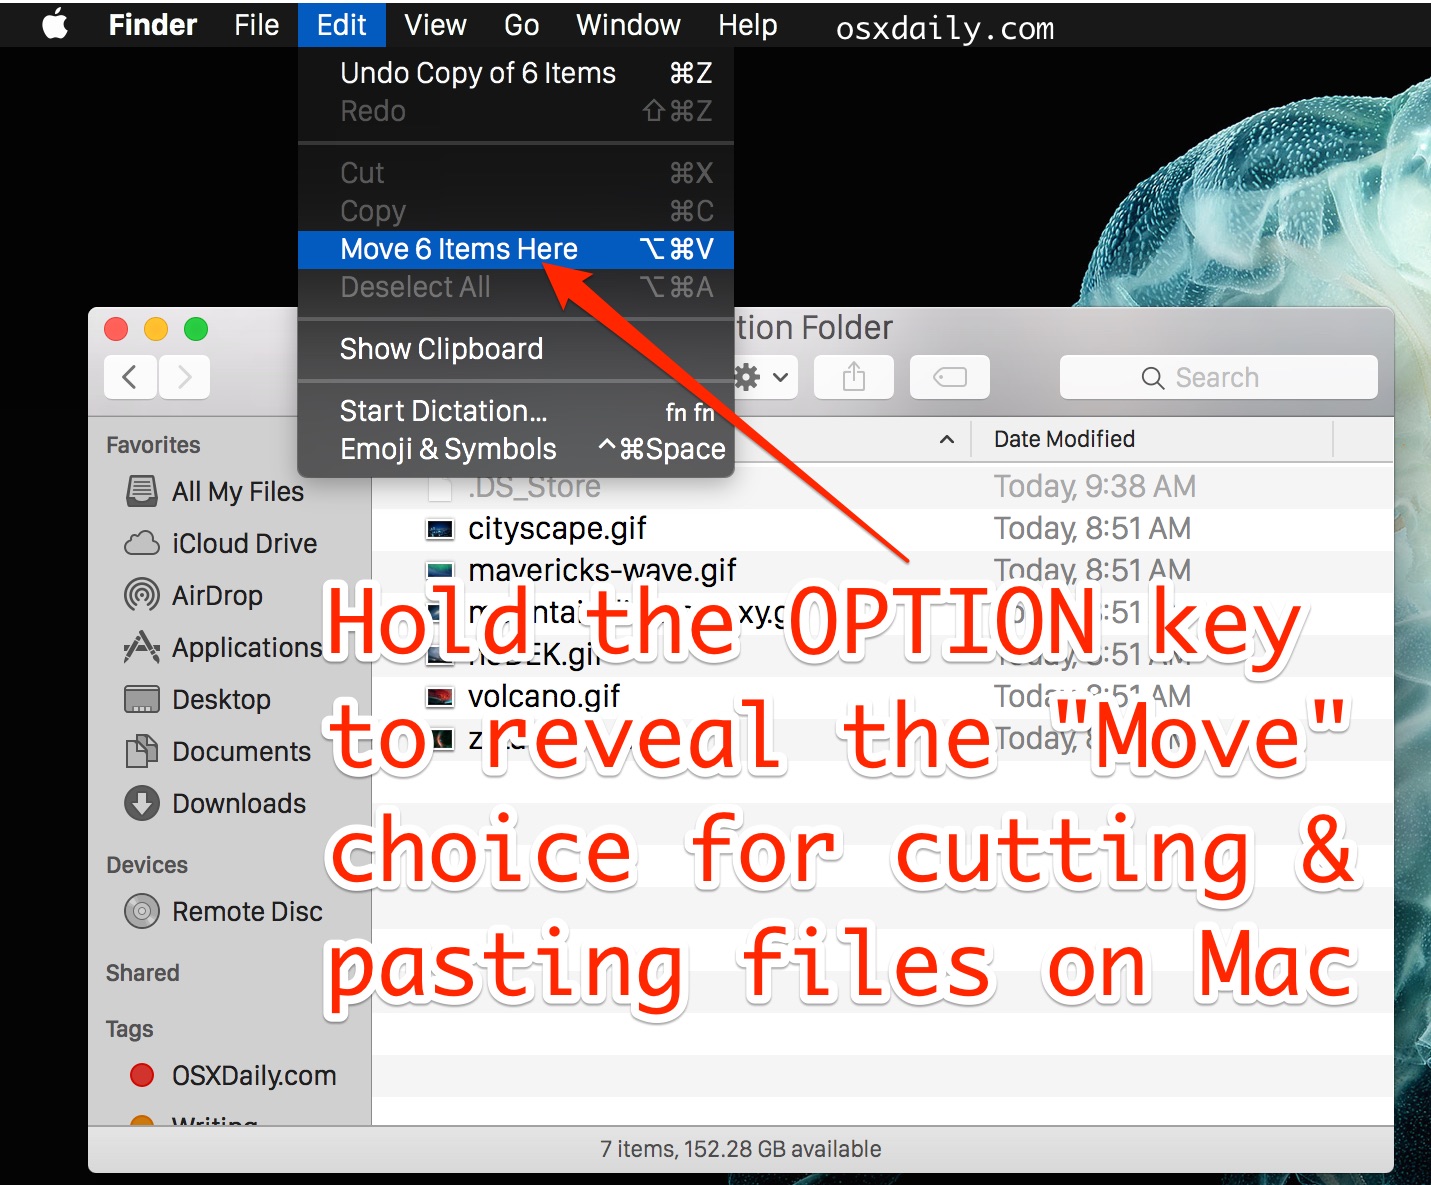
You must hold down the "Option" key to reveal the "Move Items Here" choice to actually cut and paste (move) the files.
You'll notice that you can't select "Cut", which is why you choose "Copy" in the Finder instead. The Copy command turns into "Cut" when you go to "Move" with the Paste command. You can watch this sequence directly by pulling down the menu itself to see the accompanying keystrokes as well, you'll find it in all modern versions of MacOS and Mac OS X:

Being able to cut and paste files and folders is a feature many Windows converts have been wanting for a long time. Prior to this, users would drag and drop items into their new locations to move them, or use the command line mv tool. Those methods still work too as well, obviously, but the cut and paste methodology is a very welcome addition for many Mac users.
This works the same within MacOS Mojave, Sierra, macOS High Sierra, El Capitan, OS X Yosemite, OS X Mountain Lion and Mac OS X Mavericks, and will likely continue as a feature in the future versions of the MacOS desktop as well.
How To Cut And Paste Photos On Macbook Pro
Posted by: mcgeetweve1936.blogspot.com
Source: https://osxdaily.com/2011/07/29/cut-and-paste-mac-os-x-lion/
0 Response to "How To Cut And Paste Photos On Macbook Pro"
Post a Comment